
Garlic Cheese Biscuits – Buttery, Cheesy, and Irresistibly Delicious
Introduction
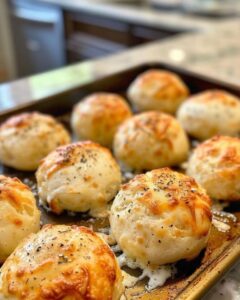
These Garlic Cheese Biscuits are everything you could ever want in a comfort food: buttery, cheesy, and bursting with garlic flavor. Soft and fluffy on the inside, with a rich, golden cheese topping, they make the perfect side dish for any meal or a tasty snack all on their own. Whether paired with your favorite soup, salad, or simply enjoyed with a cup of tea, these biscuits will quickly become a family favorite. Let’s dive right in and get baking!
Ingredients
For the Biscuits:
- 2 cups all-purpose flour
- 1 tablespoon baking powder
- 1/2 teaspoon salt
- 1/4 teaspoon garlic powder
- 1/4 teaspoon black pepper
- 1/2 cup cold unsalted butter, cubed
- 3/4 cup milk (whole milk or buttermilk for extra richness)
- 1 1/2 cups shredded cheddar cheese (or a mix of mozzarella and cheddar)
For the Garlic Butter Topping:
- 1/4 cup unsalted butter, melted
- 2 cloves garlic, minced
- 1/4 teaspoon garlic powder
- Fresh parsley, finely chopped (optional)
- A pinch of salt
Instructions
Step 1: Preheat the Oven
- Preheat your oven to 450°F (232°C) and line a baking sheet with parchment paper to prevent the biscuits from sticking.
Step 2: Make the Biscuit Dough
- In a large mixing bowl, combine the flour, baking powder, salt, garlic powder, and black pepper.
- Add the cubed cold butter to the dry ingredients. Using a pastry cutter or your fingers, work the butter into the flour until the mixture resembles coarse crumbs with pea-sized bits of butter.
- Pour in the milk and stir just until combined. Be careful not to overmix. The dough should be slightly sticky but manageable.
- Gently fold in the shredded cheese until evenly distributed.
Step 3: Shape the Biscuits
- Turn the dough out onto a floured surface and gently knead it 2-3 times to bring it together.
- Pat the dough into a rectangle about 1 inch thick. Use a biscuit cutter or a drinking glass to cut out rounds of dough.
- Place the biscuits onto the prepared baking sheet, making sure they’re close enough to each other to create soft sides, or spaced apart for crispy edges.
Step 4: Bake the Biscuits
- Bake for 12-15 minutes or until the tops are golden brown and the biscuits are fully risen. Keep an eye on them toward the end to ensure they don’t burn.
Step 5: Prepare the Garlic Butter Topping
- While the biscuits are baking, melt the butter in a small saucepan over low heat.
- Add the minced garlic and cook for about 1-2 minutes, until fragrant and golden, but not burned.
- Stir in the garlic powder and a pinch of salt. Remove from heat.
Step 6: Brush the Biscuits with Garlic Butter
- As soon as the biscuits come out of the oven, immediately brush them with the melted garlic butter mixture.
- Optionally, sprinkle with freshly chopped parsley for a burst of color and added freshness.
Pro Tips
- For an extra cheesy flavor, try adding a bit of Parmesan cheese into the dough or sprinkle it on top before baking for an added layer of richness.
- If you want the biscuits to be even fluffier, substitute half of the milk with buttermilk for a lighter texture and a tangy taste.
- These biscuits freeze well! Prepare and freeze them before baking, and when you’re ready, bake them straight from the freezer, adding a couple of extra minutes to the cooking time.
Conclusion
These Garlic Cheese Biscuits are the perfect balance of cheesy, buttery, and garlicky goodness. Soft and fluffy inside, with a crispy, golden exterior, they make the perfect companion to any dish or can be enjoyed as a stand-alone snack. Whether you’re serving them with a hearty stew or simply on their own, these biscuits are sure to please everyone at your table.
Call to Action
Did you make these Garlic Cheese Biscuits? We’d love to hear how they turned out! Share your experience in the comments below. For more easy-to-follow recipes like this one, check out our blog for even more culinary inspiration.